9.7 KiB
+++ title = "Setting up IRC with soju and senpai" [taxonomies] tags = [ "irc","privacy", "howto" ] +++
Despite the rapid movement of many Free Software project communities to proprietary platforms like Slack and Discord, many communities continue to live on IRC. Notably, The Tor Project has several channels on OFTC. While many of these projects also have bridges to Matrix channels, I don't use Matrix, and there are many communities who continue to live only on IRC.
Thus, I wanted to set up a simple IRC bouncer and client combination. While I've used projects like TheLounge in the past, I wanted an IRC experience that could exist without a browser.
SourceHut is a project that I've been interested in for a while. They provide git hosting like GitHub or GitLab, but avoid locking in projects and communities with proprietary platform-specific features. They make heavy use of mailing lists, all of their software is completely Free, and, perhaps most importantly, the project is refreshingly human. In short, they value many of the things that make Free Software more than just Open Source.
Projects that are independent, make entirely Free Software, and design systems to protect user privacy are often difficult to fund, which is why SourceHut is so exciting to watch. They seem to have a relatively steady flow of income, and I'm optimistic that their model will prove itself, paving the way for more Free Software projects to become sustainable.
While not directly related to git hosting, they also operate an IRC bouncer. In short, an IRC bouncer maintains a connection to IRC networks and collects messages for you. You can then connect to the bouncer to read those messages and send messages in the channels that you've joined.
This has many benefits over operating a client on your own machine. For me, however, the two biggest advantages were the ability to register and connect over the Tor network and financially support SourceHut. Most IRC networks fight spam by blocking registration over Tor. By contrast, SourceHut is happy to accept registration without any JavaScript; all it needed was a username, email address, and password. While the chat.sr.ht project requires a paid account, this was a perfectly acceptable compromise for me, as anonymity was never my goal.
soju, a project by SourceHut, is the software underlying
the chat.sr.ht bouncer. It's written in Go, financially
supported by SourceHut, and seems relatively simple to interface with.
Normally, I would self-host a service like this. Actually, for a while, that's what I did. What compelled me to try the hosted solution was the inherently public nature of how I plan to use IRC. I won't be using IRC for one-to-one communication, or even within small groups. That's what messaging platforms like Signal are for. I intend to use IRC for interacting with public communities, where all of my messages can (and should) be readable by everyone.
SourceHut Account Setup
As mentioned previously, SourceHut's hosted
https://chat.sr.ht instance of soju requires a paid
account. This seems fairly reasonable, especially given the very generous and
flexible pricing.
Registration is incredibly simple. All I needed to do was provide a username, email address, and password. They even let me include a PGP key to both encrypt emails sent from their service and be presented on my profile.
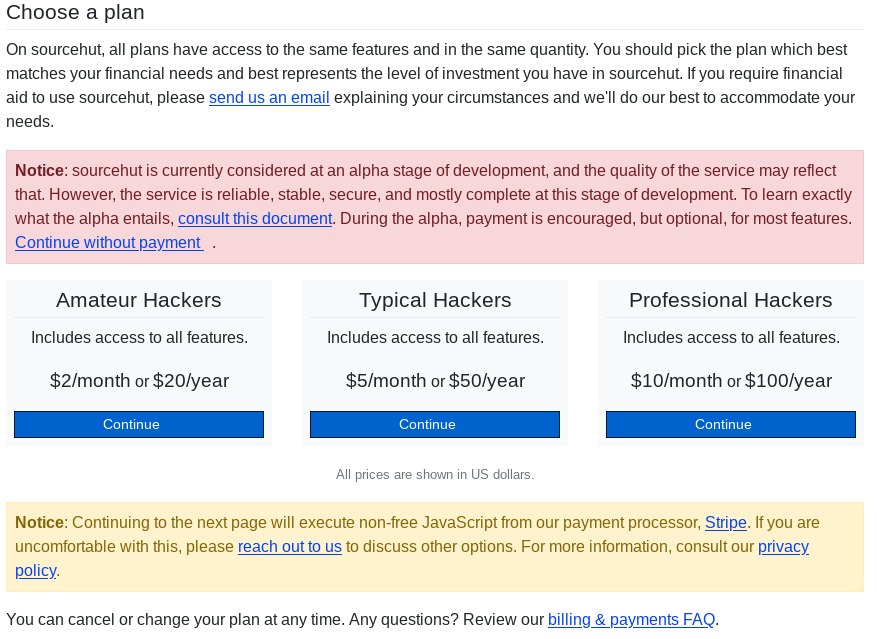
Upgrading to a paid account was just as simple. Heading to my profile page, I clicked on billing:
The billing page provided clear information on who needed to sign up for a paid account and transparency into the payment processor. I particularly appreciate the notice that non-free JavaScript would be required for payment, along with an invitation to find an alternative for those who wish to avoid using Stripe.
senpai client setup
For my IRC client, I've chosen to go with
senpai. While there are a few other
clients
listed in the soju docs, senpai is, like soju, written in Go, and
explicitly designed to work well with the bouncer. Documentation for connecting
clients, including senpai, to chat.sr.ht can be found on the official
quickstart guide.
First thing's first, we need to create a Personal Access Token for our chat. A
Personal Access Token gives SourceHut API access to your account for third-party
applications and scripts. This is done very simply in SourceHut by returning to
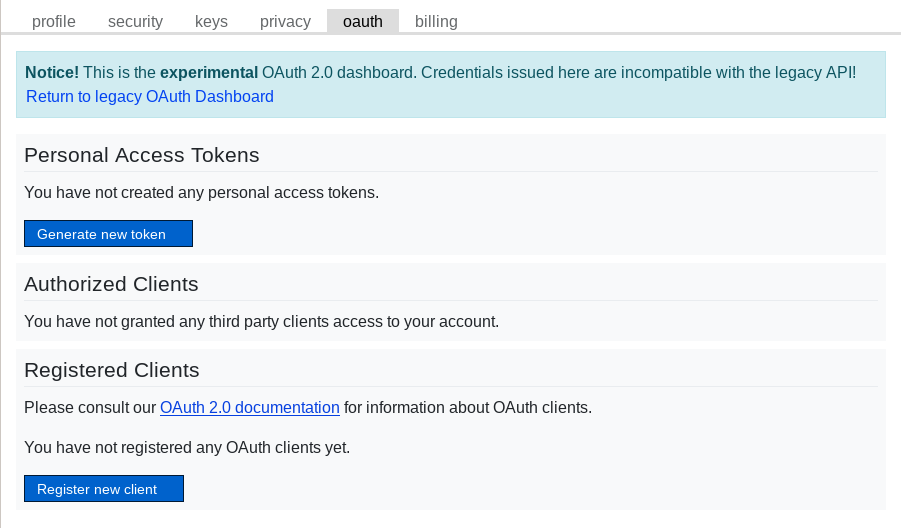
the profile page and selecting oauth.
Fortunately, senpai supports SourceHut's experimental OAuth 2.0 API.
Proceeding to the OAuth 2.0 Dashboard:
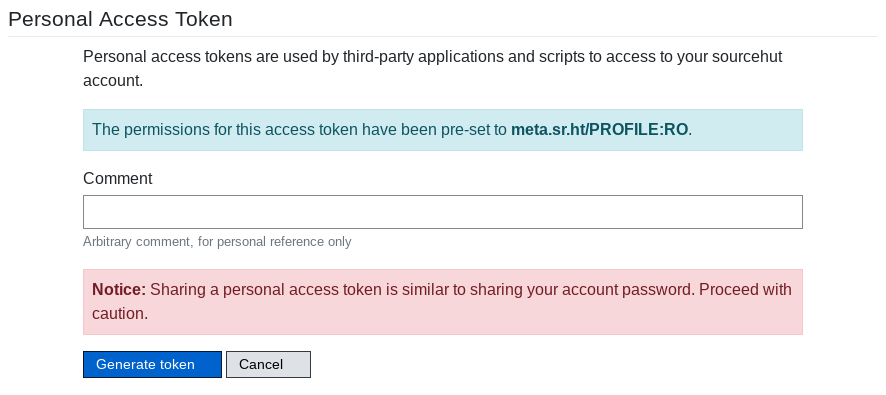
We can generate a new token. Thanks to the experimental API, we can limit the
permissions of this token so that it doesn't have access to other SourceHut
services, like git hosting or profile management. As of writing, the permission
that it needs is the meta.sr.ht/PROFILE:RO permission. This seems like a
strange permission for access to the chat.src.ht service, so I'd venture to
guess that this permission will change as the chat.src.ht service improves, or
the OAuth 2.0 API comes out of beta. I strongly recommend checking the
official quick start guide to see
if this is still the case. As of writing, the direct link to generate a new
token is
https://meta.sr.ht/oauth2/personal-token?grants=meta.sr.ht/PROFILE:RO:
Finally, we need to install and configure the senpai client. You can install
it from the official SourceHut repository.
Your system's software repository may have a pre-existing package for it.
Otherwise, it can be installed relatively simply from source by cloning the
repository and calling go install ./cmd/senpai. Make sure that your $GOBIN
is in your $PATH.
The configuration file for senpai is located at
~/.config/senpai/senpai.scfg. To use it with chat.sr.ht, it should look
something like this:
nickname your_irc_nickname
address chat.src.ht
username your_sourcehut_username
password "your_sourcehut_personal_access_token"
Note the quotation marks around your password, those are required. More
configuration options and examples can be found on the senpai man
page. The
default settings send typing indicators, so I also disabled those with typings false.
You can finally launch senpai with the senpai command. Type /HELP to get
usage instructions for senpai, or view the man
page. Below
is an example of adding irc.libera.chat as a network. I switch to the
automatically-created BUFFER 1, which is an IRC chat with the chat.src.ht
BouncerServ interface, which allows you to configure your bouncer. This is
essentially an interface to configure your soju user. Details can, of course,
be found by looking at the soju man
page.
> /MSG BouncerServ help
> /BUFFER 1
> network create -addr ircs://irc.libera.chat:6697 -name libera -nick your_irc_nickname
BouncerServ	created network "libera"
Great! Now, I'll check the status of the network:
nickzana	network status
BouncerServ	libera (ircs://irc.libera.chat:6697) [connected as your_irc_nickname]: 0 channels
Unfortunately, I haven't figured out how to open a buffer to a network without
quitting and re-launching senpai. It seems like some of the bootstrapping is
undocumented without the web UI, or I'm just misunderstanding the senpai man
page. Regardless, after relaunching, I can switch to the newly-created libera
buffer.
/BUFFER 1
To secure my nickname, I'll generate a CertFP self-signed certificate for the
libera.chat network. Details on CertFP and how to use it can be found on the
libera.chat guide.
/MSG BouncerServ help
/BUFFER 1
nickzana	certfp generate -key-type ed25519 libera
BouncerServ	certificated generated
BouncerServ	SHA-1 fingerprint: ...
BouncerServ	SHA-256 fingerprint: ...
BouncerServ	SHA-512 fingerprint: ...
Then, I'll register my nickname (in the libera.chat buffer):
/msg NickServ REGISTER your_password your_email@example.com
Don't forget to verify your email!
And, per the libera.chat guide, register my certificate fingerprint with my account:
/msg NickServ CERT ADD
NickServ:	Added fingerprint ... to your fingerprint list.
Finally, I'll join a channel in the libera buffer:
/join #sr.ht
This shows up as a new buffer in senpai.
Closing Thoughts
This process ended up being a bit more difficult than I had initially thought it
would be. Most of the issues would've been solved by just using the chat.sr.ht
web client. However, senpai is less than two years
old,
so there's plenty of room to improve. Maybe I'll try another client sometime
soon. Overall, though, I'm quite happy with how it turned out!


